This is the begining of my Puch Maxi Project. I bought this off Craigslist with a bunch of other parts for $800. All in all, there are enough parts to build two complete bikes with a spare 2-speed motor.

Manufactured in July 1978. A whopping 2HP. Made in Austria.

The parts that I bought with it. Not all pictured but notice the two extra motors and the sweet brand-new exhaust pipe.

The guy also sold me this bad-ass looking red frame with the original paint. Looks like this thing hasn't ever been ridden. What a steal.
 |
| Red Puch frame with awesome paint job |
In doing some research on the web, I came across several customs that came out really well. The best one was the one pictured below. This is what I'm targeting. I really dig the dropped handlebars, black on red look, dropped back seat, and custom wheels. Not so sure about the chrome cross-bar, but it does add a nice line to the bike.
 |
| Puch Custom |
I also dig this design, but its a Baretta. I think the concepts carry over though (handlebars, seat, wheels).
 |
| Baretta 38 custom |
Apparently the green Puch was running about a year ago, but the guy stated that the gas tank was corroded. So I decided to buy a SS water bottle from Big Lots and drill a hole in the bottom of it, add a luer fitting and some tygon tubing, and fashion my own tank.
 |
| Puch with added custom gastank strapped on with bungees. |
After giving her a few pedals, I got her to kick over and start. She started whirring pretty good and sounded fine so I was excited. But when I dropper her off the kick-stand and tried to get moving she immediately died. I was disheartened. After many many attempts, she just wouldn't go. Even if I pedaled as violently as I could, she just wouldn't take over. After reading the manual and some online blogs, I decided that either my timing was off, I wasn't getting enough compression in the chamber, or there was just too much friction in my drive system between the motor and the back wheel. Pedaling the Puch wasn't an issue and the back wheel seemed to spin easily enough, so the last option wasn't likely. Fortunately, these things are fairly simple, so adjusting the timing wasn't hard. I just got a screwdriver, loosened up the screw that holds the points solid and stuck a shim in between the points. The manual recommends a gap between .014" and .018" when the piston is at Top Dead Center. I had to pull the spark plug out and stick my finger in the threaded hole to feel the piston hit TDC, but it was pretty easy on this single cylinder. I had a set of gap adjusters for spark plugs that luckily had a .016" shim, so I used that and set it. Didn't work though. So, I figured that I wasn't getting enough compression and set out to figure out why. First thing was take off the head which is just a matter of removing 4 nuts on these long bolts. I was then able to pull off the head and the case and found the problem.
Engine with head and cylinder removed. Looks ok from this side.

Not so good from this side.
 | ||
| Motor with head and cylinder removed. |
Looks like a ring broke and got wedged between the piston and cylinder and cut some serious grooves in the side of the piston.
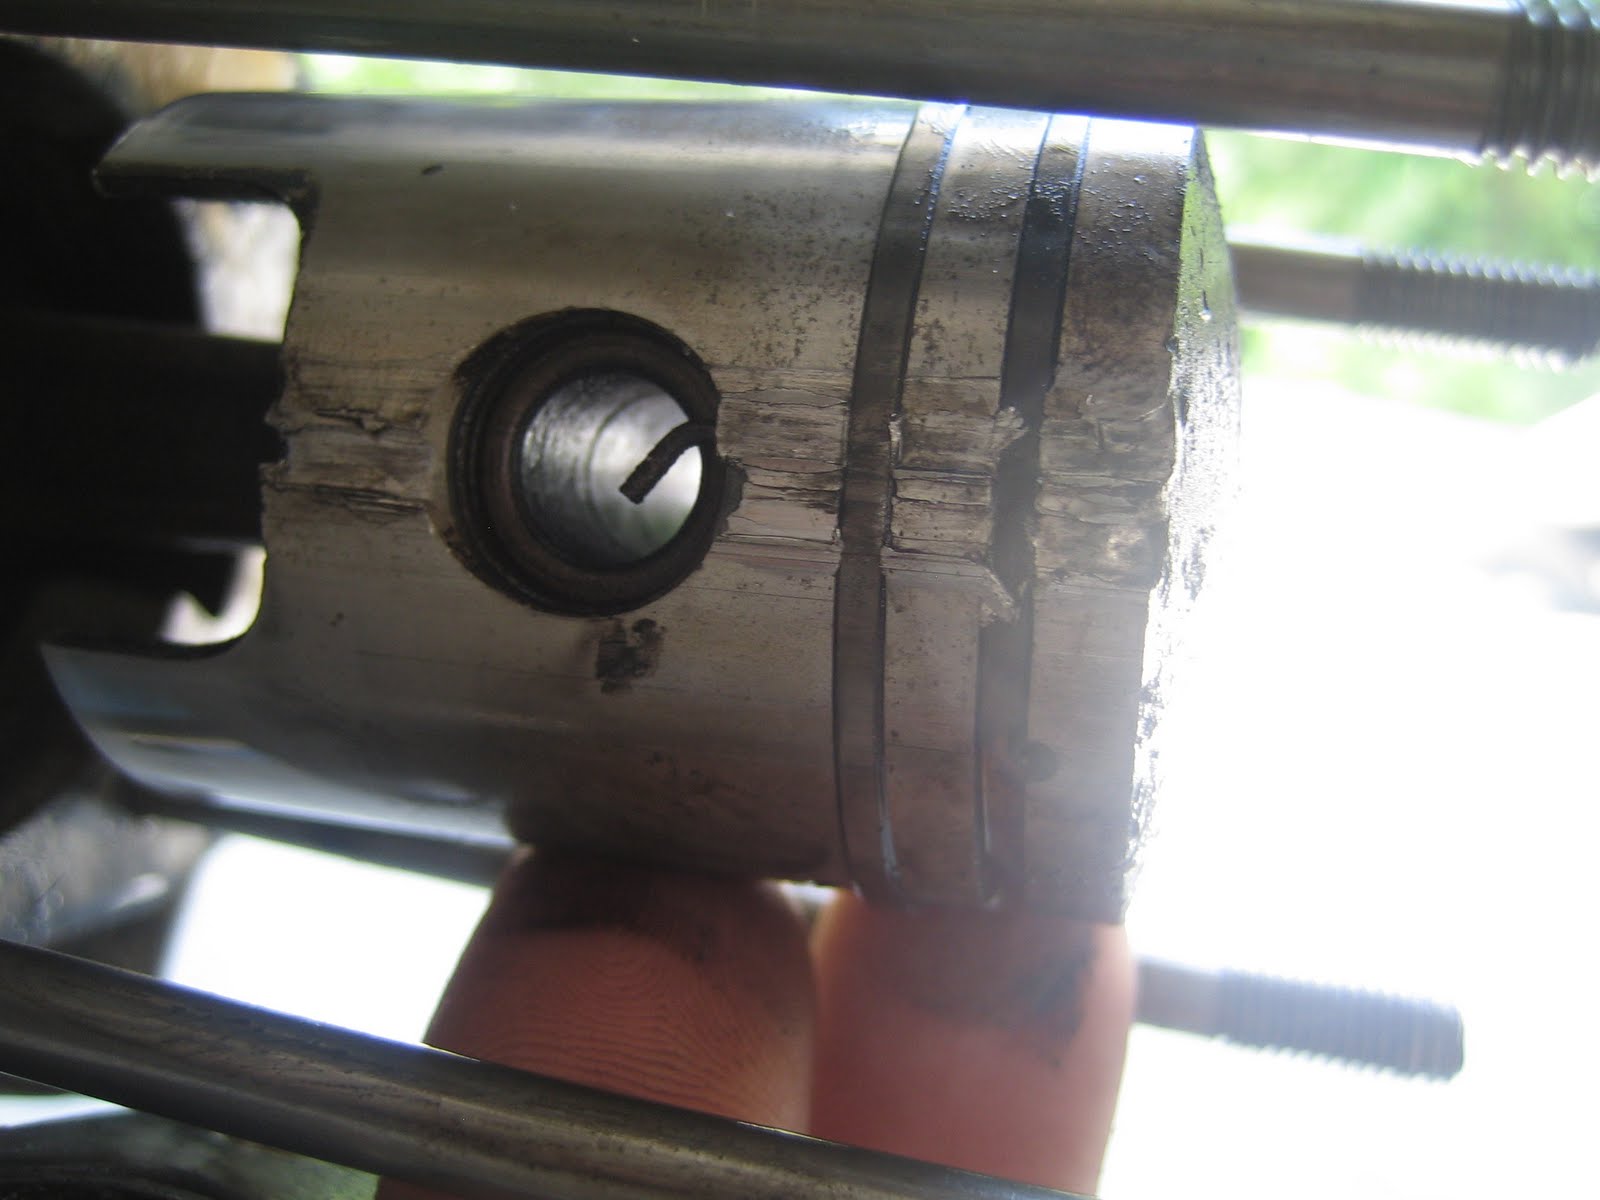 |
| Ouch! |
Cylinder didn't fare well either.
 | ||
| Also dug a nice groove in the cylinder wall. Ouch. |
 |
| Piston after being removed from crank. |
 |
| Side where ring dug into wall. |
After finding this out, I decided to replace the piston and cylinder with a new one. Luckily, there are a lot of moped junkies out there with parts for a ton of different models. Puch happens to be one of the most popular, so there are a good deal of different aftermarket parts to choose from. From an online website called treatshq.com, I found I had several options when buying a new cylinder and piston. I could upgrade my stock model and get a larger piston with improved porting (more intake and exhaust ports), or stick with the same size piston and get a bit more room above the top for more combustion volume. Not sure what that means from a performance standpoint, but since the limit for motorized vehicles that don't require registration or driver's license in North Carolina is 50cc, I decided to stick with the same cylinder size and get more clearance in the head. So I ordered some parts for $100 and waited.
In the mean time, I decided to do a complete rebuild of the engine. Started by yanking it off the frame.

Then pulled off the kickstand.

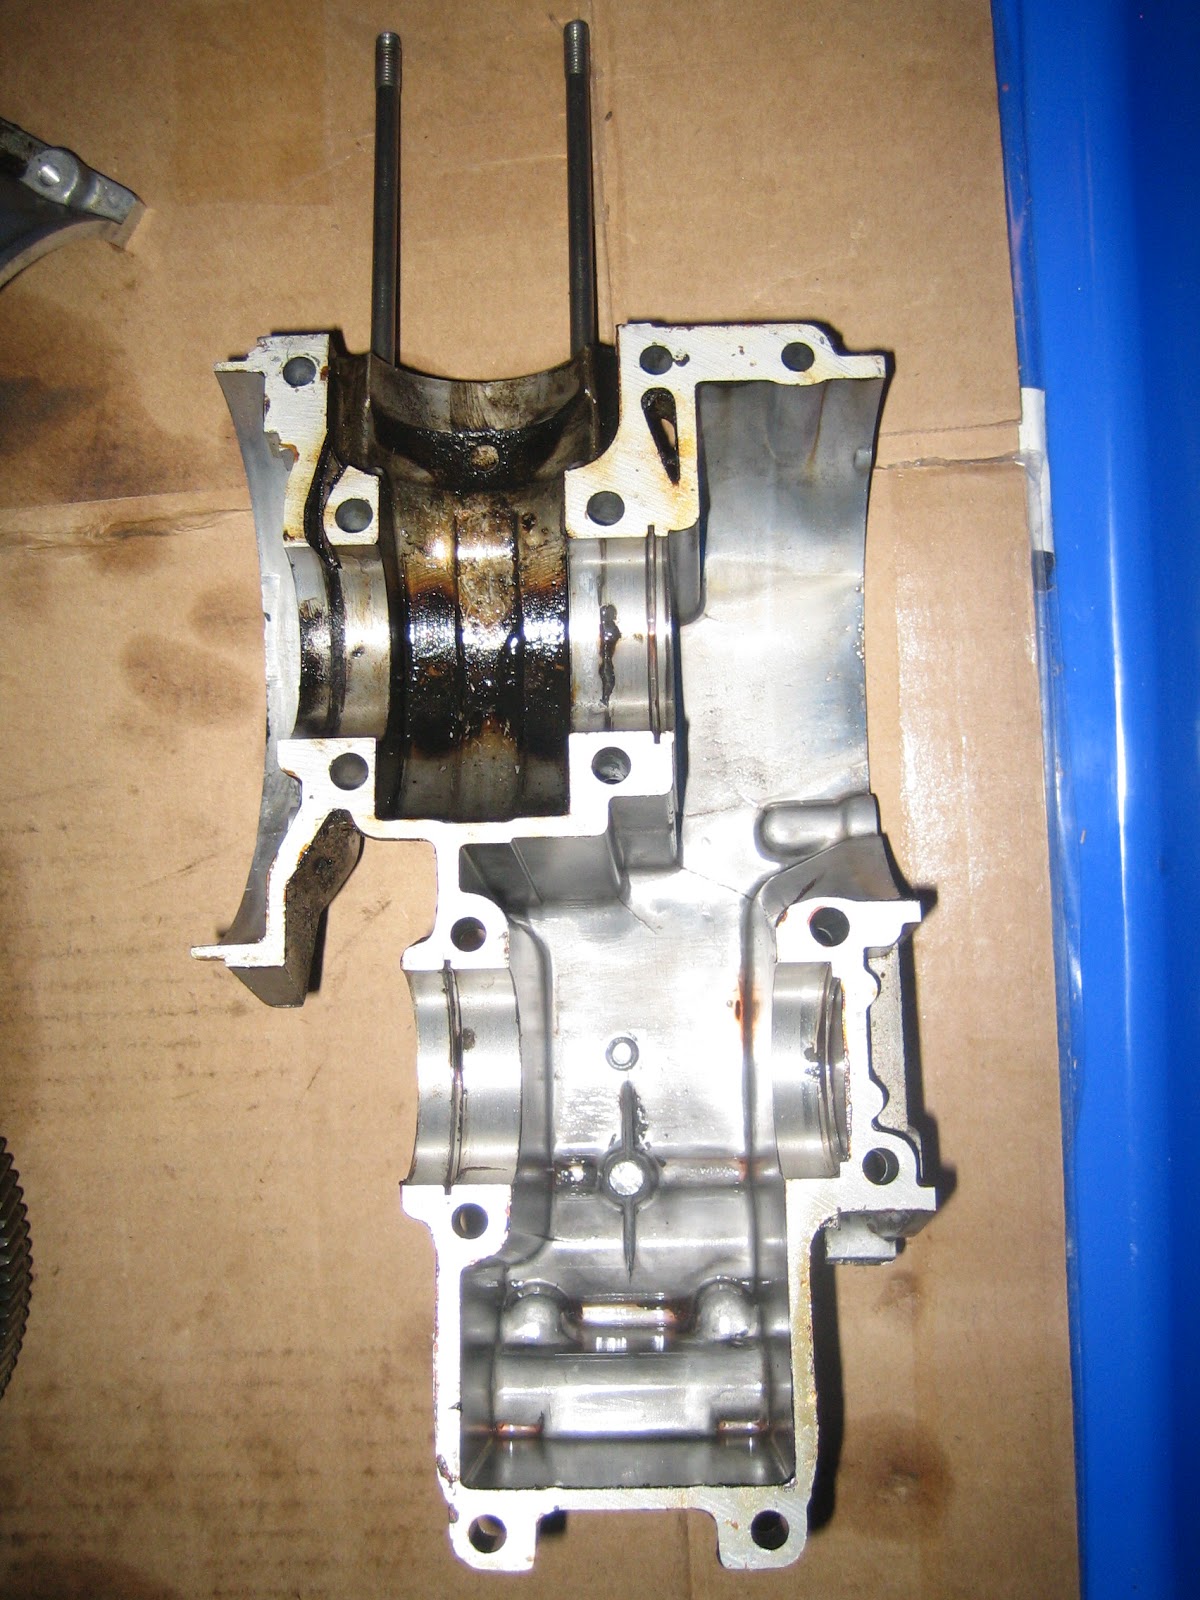
Then removed the 13 bolts holding the halves of the cases together and split the engine in half. Not too complicated.

Flywheel on the left and clutch on the right. At this point, everything looks to be in working order and decent shape, but I wanted to replace the bearings on the two shafts (main drive shaft with crank and secondary shaft connected to sprocket). This required 4 new bearings so I ordered them and began the waiting process again.
In the mean time, decided to pull the old bearings off. Little did I know how much trouble this would be. First of all, getting the clutch off of the shaft requires a clutch puller because its wedged on the drive shaft. The clutch has a tapered hole going through it that matches the taper of the drive shaft with a woodruff key in between them to prevent rotation. But once you assemble the two together, you can't get them apart without some serious muscle.
 |
| Clutch |
The same applies on the other side with the flywheel. A second custom flywheel puller.
 |
| Flywheel |
So I set out to make some custom tools and yank these bad boys off.
 |
| Custom Flywheel and Clutch pullers after removal |
My new cylinder, piston, and head came in!
 |
| New cylinder on Left. Note added rectangular port. |
 |
| New Cylinder |
 |
| New Head |
Since my new head and cylinder came in, I got the idea that it'd be cool to anodize the head to match the red color of the frame. The head in the custom above is black, so I thought I'd distinguish mine a bit by going red. I had also just taken a class at TechShop RDU, this DIY warehouse with a bunch of equipment (lathes, mills, welders, sulfuric acid bath, etc.) you can use at will if you pay a membership fee. So I set out to anodize the head. I'll blog about that in another post.
Next, I went back to trying to get the old bearings off of the drive shaft and sprocket shaft. This didn't prove to be too easy as you need a custom 3 or 4 jaw bearing puller to get these baby's off. Fortunately, Harbor Freight had a kit of 3 of them for about $12 so I picked that up and set off after em. I was able to get em off after about 2 hours of finageling. Putting the new ones back on was much easier since you can just heat them up for a few minutes (I used a heat gun). Once hot, they just slide right on.
After replacing the bearings, the engine rebuild was pretty much complete. I just have to put the motor back together.
After doing some further inspection I noticed that the case halves have some cracks in them. Not sure how deep these cracks go, but they don't make it all the way through.
 |
| Case Half |
 |
| Other half |
 |
| Cracks in the case. See em in both sides. Not through. |
With that, it's on to the new frame and wheels.
thanks for images, are very usefull, i myself have two indian mopeds and i'm trying to make them
ReplyDelete